Thursday 26 December 2013

Lamb Pasanda


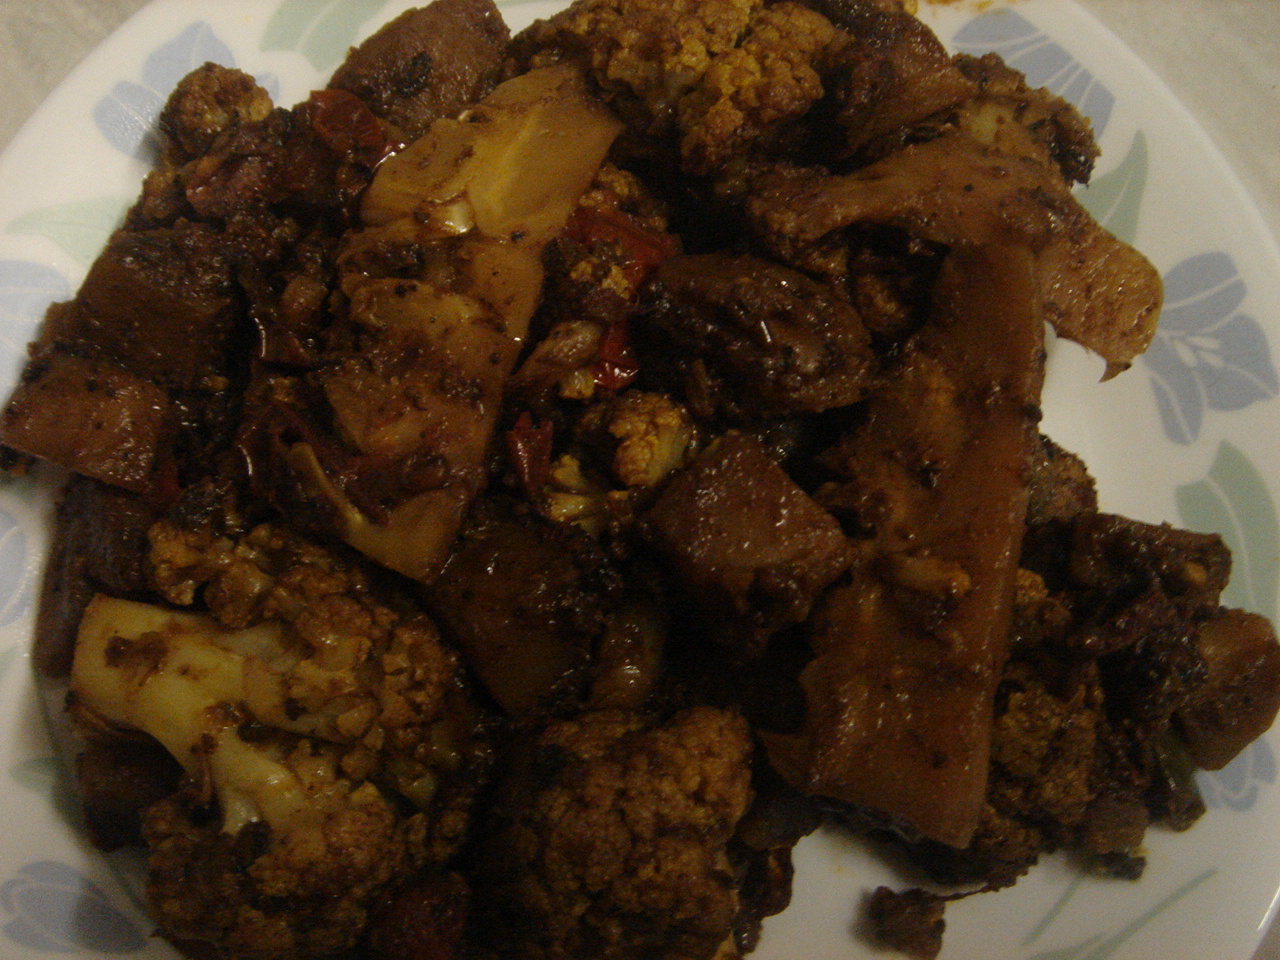
Pasanda is a Mughlai dish which was prepared for the royal families. Traditionally it was prepared using only the best cuts of Lamb but these days one finds pasanda recipes with Chicken and even Prawns. I remember accompanying my father to the butcher, where my dad would order pasanda meat. The family butcher who knew my dad well for his finickiness would first show the meat cut before preparing. It looked the best, but remember I was only 7-8 years old and every piece which my dad approved would be the best! Once the meat pieces were approved the butcher would then slice the boneless meat into strips about ½ inch steaks and tenderise them first with the sharp end of the cleaver then the back of it. While he was preparing the meat my dad would tell me how delicate the process was, as while the butcher is beating the meat he at no point should cut it through. I think this tale was not only for me, but loud enough so that the butcher could hear it as well, so that he made no mistakes.

I have had pasanda in restaurants and have been disappointed as the meat is in no way tenderised. Here I will give you an old family recipe, hopefully you would like it and notice the difference. For preparation of the steaks I went to a butcher, who knew exactly how to prepare the pasanda meat, just like what I remember from my childhood days!

Pasanda Meat
Ingredients:
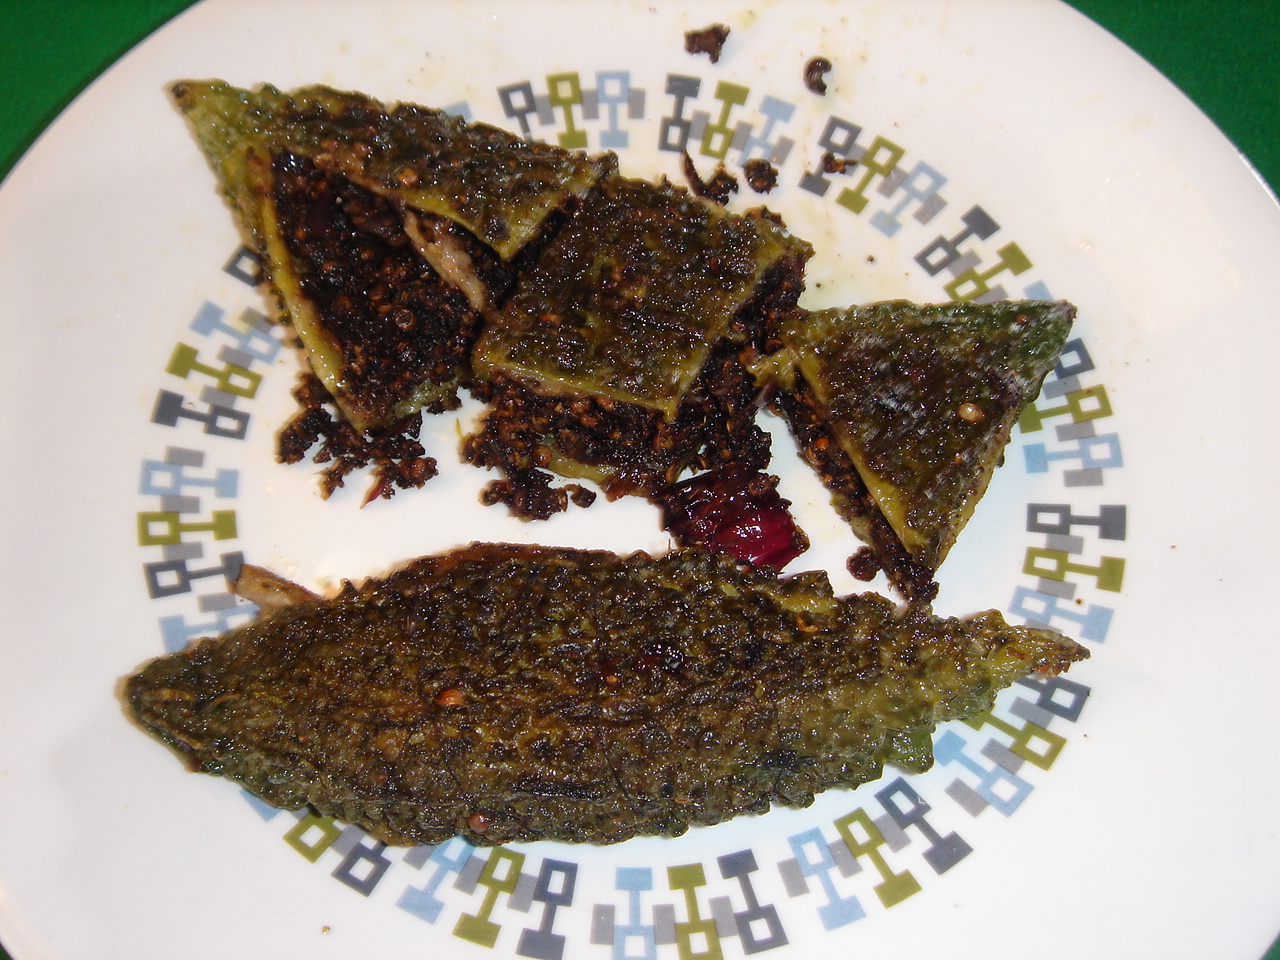
  • Lamb Pasanda 750 gms (for pasanda we need boneless leg meat which is sliced into ¼ inch thick steaks. These are then flattened and beaten lightly with a meat cleaver, ensuring that the meat is not cut through, one could use the meat tenderising mallet)
  • 1 ½ inch Cinnamon
  • 10 Green Cardamon
  • ½ tsf Peppercorns
  • 12 Cloves
  • ½ tsf Cumin seeds (Jeera)
  • 2 Bay leaves
  • Oil 4-5 tbsf
  • 5 small Onions grated
  • 1 bulb Garlic
  • ½ tsf Poppy seeds (khas khas)
  • 1 ½  tsf Salt (to taste)
  • 2 tsf Chilli powder
  • 3 tbsf Yogurt
Method:
Pasanda with all spices
  1. Soak the Poppy seeds in small amount of water for 15 minutes.
  2. Grind the soaked Poppy seeds, ¼ tsf peppercorn, 1½ tsf salt  and 6 garlic in a paste and then mix it with 3 tbsf of yogurt.
  3. Put the pasanda pieces in this marinade and leave it for 4 hours in the fridge.
  4. Grate the onions.
  5. Coarsely grind cinnamon stick, remaining peppercorns, cardamon and cloves (this is my version of garam masala).
  6. In a heavy wok heat the oil. When hot add my version of garam masala, cumin seeds and bay leaves. Let them splutter.
  7. Add onions and brown them.
  8. Add the pasanda with all marinade and mix well so that the whole yogurt mixes with the browned onions. 
  9. Add chilli powder and mix. Fry the meat till slightly brown.
  10. Add 100 mls of water, bring it to a boil and lower the heat and let the meat cook for another hour stirring it from time to time. Keep checking the meat for readiness as different meat cuts have different cooking times. May need extra water if meat catches at the bottom. In the end the pasanda should have thick gravy and the meat should be tender almost breaking with a spoon. 

Wednesday 25 December 2013

Palak (Spinach) Karhi


When we were young I can only remember having Karhi made with Pakoris. However, as I have travelled and tasted cuisines from other parts of India I realised that one could add many different things in Karhi. Here I have picked a tasty and a healthier option in Palak (Spinach) as the accompaniment.  

The recipe like the Pakori karhi is in two stages. Don't be daunted with this recipe as it is easier than the pakori karhi, a recipe which will be posted later in my blog. One has to half cook the Palak before adding to the karhi.

Ingredients:
  • 250 gms of Palak (Spinach) coarsely chopped
  • 2 pinches of Asafoetida (Hing)
  • 2 Whole dried red Chillis each broken into two
  • ½ tsf Cumin seeds
  • 400 gms Yogurt (for that tangy flavour to your karhi, keep the yogurt in a warm place for 4-6 hours when it becomes sour)
  • 1/4 cup of Gram Flower (Besan)
  • 1 Chilli powder
  • 1 Turmeric (Haldi)
  • 1 ½ tsf Salt
  • 1 tbsf Oil
For Tempering (Optional)
  • 2 tsf of Ghee 
  • Pinch of Asafoetida (Hing)
  • ½ tsf Cumin seeds
  • ¼ tsf Chilli powder
Method:
  1. Make a mix of Gram flour Yogurt and 300mls of water. One can do it in a blender. Keep aside.
  2. Heat the oil in a wok, when hot add asafoetida, cumin seeds and whole red chillis. Within a couple of minutes the chillis will brown and cumin seeds will turn dark brown.
  3. Add the chopped palak, cover and cook for 1-2 mins till the contents wilts and then uncover the wok to let the water evaporate and spinach becomes dry.
  4. Add the gram flour and yogurt mix. Keep stirring so that yogurt doesn’t become lumpy.
  5. Add chilli powder, salt and turmeric and keep stirring.
  6. Once the karhi starts to boil reduce the heat and let it cook till the gravy becomes slightly thick and right consistency.
Tempering:
  1. Heat the ghee in a small pan.
  2. When ghee is hot add asafoetida, cumin seeds and red chilli powder. Within a few minutes the cumin seeds will turn brown.

We generally add the ghee temper when serving rather than adding it to the whole Karhi. 
Karhi goes well with both rotis and rice.

Monday 23 December 2013

Dill (Suva) Aloo Sabzi


Dill or Suva as it is known in India is a seasonal green grown in the heart of India. Though it is not as popular a green as Fenugreek, Spinach or Coriander, it is however, as tasty an additive which can be added to various vegetables and dals. It is more popular in Bihar and UP.

This is one vegetable which can be prepared  very quickly. Good one to add on to the main dishes when someone comes unexpectedly. That doesn't mean it is not nice. If your guests haven't had it it before it could be a guessing game and topic of conversation over dinner!

Ingredients:

  • 250 gms Potatoes chopped into small pieces
  • A bunch of Suva, chopped coarsely
  • A pinch of Asafoetida (Hing)
  • 3 Whole dried red Chillis
  • ¾ tsf Salt to taste
  • ½ tsf Turmeric powder (Haldi)
  • ½ tsf chilli powder
  • 3 tbsf Oil

Method:

  1. Heat the oil in a wok over medium heat.
  2. Add Asafoetida and red dry chillis and brown till the chillis are dark brown and crisp. We call this step as ‘Chonk’ in hindi.
  3. Add the potatoes and cook till they are half cooked.
  4. Add the chopped suva and mix well with the potatoes.
  5. Add chilli powder and turmeric powder and cover the wok and cook till the the potatoes are done.
  6. Uncover the wok and cook to dry the vegetable.

Friday 20 December 2013

Fish Curry Didi Style


Where ever you go in India, if fish is available easily, then there would a recipe for a fish curry. Each recipe would be slightly different in different areas. My sister has lived in Kolkata but still makes fish curry which would perhaps be more in tune with one prepared in the Old Delhi style. This version of Fish Curry is her style. It is lightly different from the one I have written about in the past but I quite liked it.

In Delhi, one mainly gets river fishes. The common fresh water fishes that are generally available in Delhi are Singhara, Surmai, Sole, Rahu and Betki. The first three are easier to fillet as there is only a single central bone, whereas, Rahu and Betki have many small bones. People who don't mind bones may well find the later fishes tastier. 

In preparing this we bought Surmai, which was filleted and cut into 2-3 inches wide pieces. 

Ingredients:

  • 1 Kg Fish cut into small 2-3 inch pieces
  • 4 Small onions chopped or grated.
  • ½ tsf Fenugreek (Methi) seeds
  • 2 tsf Chilli Powder
  • 3 tsf Coriander powder
  • ½ tsf Turmeric (Haldi) powder
  • 1 tsf Salt to taste
  • 2 tsf Mango (Amchoor) powder
  • 3-4 tbsf Oil for cooking

Method:

  1. Heat the oil in a wok. When hot put the Fenugreek seeds.
  2. As soon as the fenugreek seeds turn brown (not black) add onions, chilli powder, coriander powder, salt and Turmeric powder. Brown these over medium heat.
  3. Add Mango powder and mix well.
  4. Add the pieces of fish and lightly fry in the masala.
  5. Add 300 mls of water and mix well. Let the fish cook on open wok so the gravy becomes slightly thick as well. However, this preparation requires thin gravy.

Monday 16 December 2013

Besan Chilla (Spicy Gram Flour Pancake)


I have been in Delhi for a few weeks now and have tasted so many preparations, which were just memories from childhood, not-so-long-ago! In my journey of exploring new and old dishes during my stay in India, I have picked chilla as my first entry. What better dish than chilla - which is like a pancake, both salty and spicy and is eaten for breakfast!
Chillas can be made from moong dal or besan (gram flour). I would imagine that Chilla - like many-a-besan (gram flour) dishes, originates from Rajasthan. However, Moong dal chillas are more popular amongst families in general, as well as on cookery programmes, whereas I can only remember eating besan chillas for weekend breakfast in our house. I don't remember having chillas at anyone else’s homes either…but this may well be, because it is mainly eaten for breakfast and one doesn’t often get invited for breakfast!
Chillas need to be prepared fresh and eaten straight from the pan. It is usually eaten with chutney and I would specifically recommend eating it with green spicy coriander chutney.
  
Ingredients:
  • 250 gms Besan
  • 1 tsf Ajwain (Carrom seeds)
  • 1 ½ tsf Salt
  • ½ tsf Chilli powder
  • ¼ tsf Turmeric powder
  • 1 tsf Garlic paste
  • 1 tsf Ginger paste
  • Hand full of chopped methi (Kasori)
  • 1 medium onion chopped finely
  • Oil for shallow frying
  • Batter Mix
    Ingredients mix

Method:

  1. Mix all the ingredients except oil with approx 200 mls of water into a batter which should similar consistency to pan cakes batter. Keep aside.
  2. Heat a flat frying pan over medium heat. When hot spread some oil and wipe it with a tissue.
  3. Now put a ladle full of batter in the middle the frying pan and spread it into a pancake.
  4. Put some oil on the pan cake and let it cook it on lower heat till the under surface of the pancake is lightly brown.
  5. Now turn over and cook the other surface till that is also lightly brown. You may want to press the pancake with a flat ladle so the whole pancake is heated evenly.
  6. Eat it with chutney.

Thursday 21 November 2013

The Journey - Exploring the streets of India for that taste of India

I have such beautiful memories of having the most wonderful food in what we refer to as Purani (Old) Delhi. Delhi is well known for its Bazaars, full of street vendors and small restaurants, famous for a ‘one-dish’ speciality. Some of these vendors became so popular that people would come from far off places and insist on eating at these joints. It is not only Delhi which has such famous and popular food dishes, but there are other towns and cities in India which are equally renowned for their cuisine. These are often referred to as Street food. Sometimes one can even get that perfect Tarka Dal or Mutton curry on the road side at one of the communal tandoors on the main road near villages often catering not only for the villagers but for the passerby's!  

For a long time now I have been thinking of revisiting the streets of India for just that exquisite Indian food. This would be a big undertaking, but something if I can achieve it, would be dream come true.

When we were young we didn't travel much, so I know mainly the streets food vendors of Delhi and some of the cities in Uttar Pradesh. However, we know that every region in India has some classics loved world over. This in mind I have undertaken that I spend longer time in India. I am not sure how I would cover this vast nation of ours, but I do intend to give it a good go. I would have liked to cover one region at a time but, with meagre resources I may just cover different areas opportunistically.

In undertaking this task, I recognise that I would need much help from friends and family. I would also need friendly vendors who would share their stories and occasionally the recipes. When I can’t get the recipes I would like to tell a story which may explain why I think a particular dish deserves to be on my blog. I would also get some local ladies and maids to replicate some of the fabulous dishes which are sold in their villages or towns.

I would love to hear from the hundreds of followers of this blog about their memories from childhood or present. They may have eaten something memorable near to their home or while visiting a place on holiday. I would try my best to visit such places if I can.

In my pre-retired life I was neither a cook nor a blogger. At best I enjoyed a good meal and and a lot of entertaining. I could cook a handful of preparations. However, since I took up cooking I have learnt and am enjoying preparing new and wonderful dishes, which is perfect for entertaining.

Unlike some big and not so big names who come on the TV programs I have undertaken this task independently. This poses great many hurdles. Some like camera handling I have to sort out at the outset and hope with experience I would get better. My friends on the blog have already advised me on the choice of camera, which I have invested in. Now I have to ask someone to help me use these modern cameras to their fullest potential. I am sure there would be many hurdles which I would only come across as I start my journey. 
My enthusiastic friends and family members site professionally made websites of well know chefs and TV personalities to shape my blog on. What they don’t realise it is that neither am I a great cook, nor do I want to copy anyone’s style. I am just a chap who is exploring Indian Street food at its best, and I am trying to write about the story behind these fabulous places. I am sure all my friends mean well and are being helpful. So keep up with the suggestions, I will listen to all but do as I see fit.

This in mind I have booked myself a working holiday for five months in India. My base would be Delhi but I hope to travel to different parts of India and I would hope to bring some colourful sights and recipes. 


Saturday 17 August 2013

Tamatari Gobi (Cauliflower)


It was a bargain at the Newport Market when I bought a box full of plumb tomatoes. One can eat only so much of it even when the tomatoes are as sweet as the box I bought. I had salad almost everyday, used the fresh tomatoes for cooking and made some tomato chutney. That gave me an idea to try this dish. Along with the box of tomatoes I had also bought fresh ginger and green chillis. I know my friends and family in India must be wondering what is this chap talking about fresh ginger and chillis, well we in the UK(outside London) get very excited when we get fresh Indian vegetables!

I used to love the whole cauliflower that my mother made with green masala as she called it as she didn't use any dry spices for this dish. That recipe is for a later post. This dish is a variation of it. 


Ingredients:

  • One medium sized Gobi (Cauliflower) cut into medium sized pieces
  • 4 tbsf Oil
    Tamatari Gobi
  • 1 small Onion finely chopped
  • ½ tsf Methi seeds (fenugreek seeds)
  • ½ Kg Plumb Tomatoes halved
  • 5-6 Green Chillis chopped
  • 2 inches fresh Ginger cut to matchstick size
  • ½ bunch fresh Coriander chopped  
  • 1 tsf Coriander powder
  • 1 tsf Salt to taste
  • 1 tsf crushed roasted Cumin seeds
  • ½ tsf Garam Masala (optional)


Method:

  1. In a wok heat the oil.
  2. When it is hot add the Methi seeds till they turn dark brown (not black).
  3. Add chopped onions and fry lightly.
  4. Now add the tomatoes, ginger and green chillies, fry till oil separates.
  5. While the tomato masala is browning, put the gobi (cauliflower) pieces in boiling water and leave for 5-10 minutes.
  6. Add salt and coriander powder to the tomato mix and fry for 1-2 minutes.
  7. Now put the gobi (cauliflower) in the tomato mix, pouring the mix over the gobi pieces. Cook in medium heat for the gobi to brown on the edges, before lowering the heat. 
  8. Add the fresh coriander and crushed roasted cumin and garam masala (optional). Cover the wok and let it cook for another10 minutes or till the gobi is done. I like the gobi to be crunchy!

This goes very well with Parathas but also as a side dish with other dishes. 

Thursday 15 August 2013

Butternut Squash (Kaddu)


Butternut Squash is very similar to the edible Pumpkin (Kaddu) we get in abundance almost all year round in India. I am sure someone will correct me if I am wrong. At least in the UP you would be served almost at every religious festivity. It is cheap and so easy to cook that it is a good vegetable to prepare for larger gatherings in the villages. My favourite  recipe is from my maternal family home. 

Butternut Squash has become very fashionable lately. Lots of chefs on the TV are using it, some in the salads, others mixing it with various meats as a tenderiser or a sweetener. Because of its resurgence it is freely available in the supermarkets of UK. It looks rather grand but tastes exactly like the Kaddu in India. As it is smaller it is very convenient to use up the whole, some as a vegetable and the remainder for salad.

Ingredients:

  • One Butternut Squash cut in to 1 inch chunks. I leave the skin on as it keeps the pieces together and has its own taste. 
  • 3 tbsf Oil
  • 1-2 dried whole red Chilli
  • ½ tsf Methi seeds (fenugreek seeds)
  • ½ tsf Haldi (turmeric)
  • 1 tsf Salt
  • 1 ½ tsf Mango Powder (Amchur)
  • ½ tsf Sugar


Method:

  1. In a wok heat the oil.
  2. When it is hot add the Methi seeds till they turn dark brown (not black).
  3. Crush the whole dried red chilli into 2-3 pieces and add to the oil and let it brown.
  4. Now add the haldi and salt and mix it for 1-2 minutes.
  5. Add the Butternut Squash pieces, mix well with the above ingredients.
  6. Add 2-3 tablespoonful of water cover and cook in low heat for 10 minutes.
  7. Add Mango powder and sugar. Mix well and cover the wok and cook for another 10-15 minutes or till the Butternut Squash can be cut with a blunt spoon. It there is too much fluids remove the cover and let the water evaporate.


Tuesday 18 June 2013

Sambhar


Sambhar for South Indians is as important as the dal is for the North Indians. It is probably prepared with a whole variety of meals. All sections of South Indian society will not present a meal without the Sambhar. It fact some would say this is the way South Indians prepare their dal. The flavour varies not only depending on the vegetable one adds but also from region to region of South India.

I spent a couple of days with my friends from Kerala, and what a treat that turned out to be. Did we not only make Dosas but I ended up learning how to make authentic Keralite Sambhar, Rasam, Idli and vadas. I think I will start my South Indian section with Sambhar, which as I have mentioned, is so central to the South Indian cuisine that it deserves to be the first item on this blog.

I have included Sambhar for my Kayastha family as a treat, it is slightly different from the dals they prepare. It is full of goodness not only from the dal but the fresh vegetables from our local market.

Ingredients:
  • 3/4 cup Toor or Masoor dal 
  • Chopped vegetables - Couple of carrots, Potatoes, 1 chopped onion, 4 florets of cauliflower, courgette are just a few examples that can be used.
  • 1 tsf Mustard seeds
  • Few Curry leaves
  • 1 tsf Hing (asafetida)
  • 1 Whole Red Chilli
  • 1/2 tin of chopped Tomatoes
  • 3-4 tsf Sambhar powder
  • 3/4 tsf Haldi powder(Turmeric powder)
  • Imli (Tamarind) to taste
  • 1 tsf Salt
  • 2-3 tbsf Vegetable Oil for cooking.

Method:
  1. Cook the dal in a pan. It needs to be slightly under cooked at this stage.
  2. Add salt and the vegetables for approximately 5 minutes or till the vegetables are slightly cooked.
  3. While the dal is cooking heat the oil in a wok and add mustard seeds (and channa dal optional).
  4. As soon as the mustard seeds start to splutter add the sliced onions, dried red chilli, fresh curry leaves and fry till onions are slightly browned.
  5. Add sambhar powder, hing and haldi. Mix and fry for a couple of minutes.
  6. Add the chopped tomatoes and mix stir well browning these slightly.
  7. Add the dal to this mix and cook for another 4-5 mnutes.
  8. Add imli and mix well.
Normally I would make Sambhar with Dosa's or Idli, but here I have prepared it with a vegetarian meal and I surely have enjoyed it.


Monday 17 June 2013

Methi Gajjar (Carrot)

This is part of the food I prepared for someone who is a vegetarian and doesn't use onion and garlic in their cooking. This dish is similar to the methi aloo to make but tastes different. I picked gajjar as this was what I had bought in abundance from the local market. Lots of my friends have thought that it tastes of prawns (I don't think so!), so for my vegetarian friends this may be as near a taste as you will get of prawns!


Ingredients:
  • ½ Kg Carrots
  • Pinch of Hing (Asafoetida)
  • 1 Dried Red Chilli
  • 1 ¼ tsf Salt
  • ¼ tsf Chilli powder
  • ½ tsf Haldi (Turmeric)
  • 1 Bunch of Fresh Methi (Fenugreek)
  • 3 tbsf Oil
Method:
  1. Pick the leaves off the methi (if you are lazy like me soak the dry methi, approx 1 cup full) and wash off any dust. 
  2. Peel and cut the carrots in to small pieces, perhaps the size of king prawns (if you want to tease people that it is really a prawn dish .
  3. In a wok heat the oil over medium heat.
  4. When the oil is hot put the hing which will start to sizzle straight away.
  5. Break the dried chilli into 2-3 pieces and add it to the oil, wait till the chilli has browned.
  6. Add haldi and chilli powder and cook it for 2-3 minutes.
  7. Add the carrots and slightly fry these may be for 5 minutes.
  8. Add the washed methi leaves, mix well.
  9. Add the salt. Lower the lid and cook till the carrots are soft. You may need to stir a few times ensuring the carrots don’t catch at the bottom.


Rasedar Lauki (Marrow)


Once again this is another dish for vegetarian and non onion and garlic eating menu. It is simple and when one is making several dishes his is a good one to add. It tastes wonderful.

Ingredients:
  • One medium sized lauki (marrow) peeled and cut in small size pieces
  • 1 tbsf Oil
  • 1 tsf Cumin (Jeera) seeds
  • 2-3 whole dried red chillies (to taste)
  • 1 pinch of Asafetida (Hing)
  • ½ tsf Salt (adjust to taste)


Method:
  1. In a wok heat the oil, when it is hot add a pinch of Asafetida.
  2. As soon the asafetida starts to sizzle add cumin seeds and crushed whole red chillis.
  3. As soon the cumin and chilli become brown add the cut lauki and salt. 
  4. Give it a good stir and add half a cup of water. Cover the wok and lower the heat and let it cook for approximately 10 minutes or till the lauki is cooked.

A Request for a Vegetarian Meal without Onions and Garlic


I was requested to post recipes for a meal without any onions and garlic. This was because the person who has requested is attending a wedding in a Kayastha family. Initially I was surprised by this request as most Kayastha’s I know are meat eating and few if any dishes are prepared without onions and garlic. However, I was wrong as there are many vegetarian Kayasthas who would not eat meat, but I am not sure about the onion and the garlic (which I had mistakenly considered mainly a Brahmin trait!). When one thinks about it there are several dishes which are equally wonderful without the onions and garlic. With this in mind I took a trip to our local vegetable market.

We are lucky in Newport, Wales in having a Saturday morning market, which is not as buzzing as the Sabzi Mandi (Vegetable market) in Delhi,


but at least we do see lots of fresh fruit and vegetable. Some grown locally and others imported from various parts of Africa and Asia. I wanted to prepare this meal with as fresh ingredients as possible.  So here I was in the market and found fresh tomatoes, garlic (which I can’t use for this meal!), lauki, mushrooms, cabbage, gajjar (carrot), muli (white Indian radish), beans and arbi. I thought I should be able to make enough dishes from these ingredients.

With the above fresh vegetables I thought of the following menu for my friend who wants a vegetarian meal without onions and garlic:

  1. Starter
  • Stuffed Mushrooms (recipe already on the blog) 
  • Cabbage Kofta Pakora (recipe already on the blog)

  1. Main Dishes
  • Lauki rasedar with jeera
  • Sambar (I didnt use onions which I know a lot of people use)
  • Fried Arbi (recipe already on the blog under vegetarian dishes)
  • Gajjar methi

  1. Sweet
  • Gajjar ka halwa for afters.

I hope this would go down for my vegetarian Kayastha friends as well. I am sure I will get some feed back.

I have already posted the recipe for Fried Arbi, stuffed Mushroom (for this meal I did not add garlic) and Cabbage kofta Pakora which are all under vegetarian dishes, but the next entries would be the above dishes. So here we go for the next few posts!

Monday 20 May 2013

Stuffed Karela with Kalonjee

Karela (Bitter Melon) is an Indian Vegetable which we have started to see in the UK Indian grocery stores. It is one of those Indian vegetables which is very much an acquired taste, you either love it or don't want to go anywhere near. I was in the second category till its recent resurgence in the UK. When I think about why I didn't like it as a child, it probably was because of it's looks. I would visualise it looking like a green mouse running around. Well it certainly doesn't run around, but as it's English name suggests it is bitter in taste, unless one uses lots of spices to mask the bitterness and then one starts to like it very much. This is what this recipe does very well.

Karela in India is alleged to have lots of medicinal qualities and recently there have been many articles about its benefit in treating Diabetes. Just as well then it is popular amongst the Indians who have one of the highest incidence of Diabetes.


Ingredients:
  • Karela 4 pieces
  • Dhaniya whole 1/4 cup full
  • Sonf                                 1/4 cup full
  • Kalonjee seeds (onion seeds) 1 TSF
  • Whole Methi seeds 1 TSF
  • Whole Jeera 1 TSF
  • Shah Jeera 1 TSF
  • Whole red chilli approx 1 TSF small size
  • Mango Powder 2 table spoon
  • Salt         1 TSF
  • Onion 1 small
  • Garlic Cloves 2 cloves
  • Oil for cooking

Method:
  • Dry roast Daniya, Sonf, Kalonjee, Jeera and Methi seeds in a frying pan.
  • When above is almost roasted add Shah jeera and whole chillis and roast these as well for 1-2 mins.
  • Put the above in a blender and make a powder. Add salt and Mango powder to the above and mix. This can now be kept as a fillings as ‘Kalongee’.
  • Lightly scrape the Karela. 
  • Microwave the Karela for 5-8 minutes
  • Take Karela out of the microwave and split open from the side (make sure you do not fully cut it into halves) and take the seeds out. Throw away the hard ones but the small soft seeds can be used for filling.
  • Cut the onion into small cubes (just like preparing for making curry).
  • Brown the onion in 2 table spoons of oil in a pan. When slightly brown add the crushed garlic. When both a lightly golden brown add the Kalonjee masala powder. If you have kept the soft seed from Karela you can crush and add these as well. Now fill the Karela with this stuffing and seal the Karela side with wet atta (flour) with salt. You can tie it with thread as well.
  • Shallow fry the Karelas until brown on all sides (takes approx 10mins). 
  • Cut the Karela into 2 inch pieces for serving. This is best done hot at the time of serving.

Wednesday 15 May 2013

Sookhi Lauki


Lauki also known as Ghiya, is from the marrow family. It is one of the commonest vegetable seen in the Indian markets. It is cheap and very easy to make. I remember it was often prepared when we were unwell. This was because it is supposed to be digested easily. However, you don't have to be unwell to have it as it is equally tasty when you are not unwell! In the literature there are so many medicinal qualities attributed to it, I can’t vouch for these, but looking at the raw marrow one can almost see it being filled with vitamins and goodness. 

It is a versatile vegetable which can not only be easily made within 15 minutes, but can be converted to mouth watering vegetable koftas and even sweets. Hopefully, I will give these recipes one day, but for today, I am giving you the simplest recipe. This is made with Jeera (cumin) seeds. 

Ingredients:
  • One medium sized lauki (marrow) peeled and cut in small size pieces
  • 1 tbsf Oil
  • 1 tsf Cumin (Jeera) seeds
  • 2-3 whole dried red chillies (to taste)
  • 1 pinch of Asafetida (Hing)
  • ½ tsf Salt (adjust to taste)

Jeera Lauki
Whole Lauki


Method:
  1. In a wok heat the oil, when it is hot add a pinch of Asafetida.
  2. As soon the asafetida starts to sizzle add cumin seeds and crushed whole red chillis.
  3. As soon the cumin and chilli become brown add the cut lauki and salt. Give it a good stir and add a table spoon of water. Cover the wok and lower the heat and let it cook for approximately 10 minutes or till the lauki is cooked.

Thursday 9 May 2013

Pork Vindaloo (Goan Style)


Vindaloo dishes got popularity in the Indian Restaurants and for most, it just meant the hottest curry. In fact the original Vindaloo dish is a Pork dish, which originates from Goa. As the Indian cuisine was being promoted in the UK by Bangladeshis, who are almost all Muslims therefore couldn’t offer any Pork, because of their religion, so in the UK most locals would have never tasted the real Pork Vindaloo dish. Instead one would be given lamb, chicken vindaloo.

Vindaloo in fact is a Portuguese dish (Carne de Vinha d’ Alhos), which they prepared using wine and garlic. Later on the wine got substituted by vinegar. In Goa (which was a Portuguese colony), they started using Kashmiri chillis (which as you would know is not hot but gives the most beautiful red colour and flavour to the dishes. One can use any meat but traditionally it is Pork which is the most common in Goa. 

Another misconception is that Vindaloo is the hottest dish (which is what the UK Bangladeshi Restaurants felt and just added extra red chillis). However, it is a very spicy dish and the red colour is often described as fiery! Kashmiri chilli is not available in the UK stores except in the Indian grocery shops in most major cities. I guess one could use Paprika but you wont get the fiery taste.

 Ingredients:
  • 500 gms Pork cut into small pieces.
    Pork Vindaloo
  • 1 Large onion chopped finely.
  • 6 dried Kashmiri mirch (chilli).
  • 3 Garlic cloves crushed or paste.
  • 1 inch Ginger grated or paste.
  • 1 tsf Haldi (turmeric).
  • 1 Cinnamon stick.
  • 4-6 Peppercorns.
  • 3-4 Cloves.
  • 4-6 Cardamons. 
  • 2 tsf Jeera (Cumin) seeds.
  • 1 tsf Dhania (Coriander) seeds.
  • 5-6 tbsf White Vinegar.
  • 1 tsf Salt (to taste).
  • 1 tsf Brown Sugar.
  • 4 tbsf of vegetable Oil.


Method:
  1. Grind the Kashmiri mirch, peppercorn, cinnamon, cardamon, cumin seeds and coriander seeds in a grinder. Add this mixture and turmeric to the vinegar, to make a slightly runny paste.
  2. Add the pork pieces to the paste and keep aside. Some people leave it overnight in the fridge.
  3. In a pan with cover, fry the onions to a golden colour. 
  4. Add ginger and garlic paste and fry for 2-3 minutes.
  5. Now add the pork with the marinade including all juices. Fry it till oil separates.
  6. Add sugar and about 200mls of water. Bring it to a boil and lower the heat. Cover the pan and let it cook for about 45 minutes or till pork is tender. You may need to check and add more water if the gravy is becoming thick.

Serve hot with rice.
(I have kept it very dry because that is what I like and eat it with chapatis, but in Goa one would see more gravy i.e., adding more water and served with rice).